How to Fine-Tune an Open Source LLM Step-by-Step (2025 Edition) Part-2
This article is an extenstion of How to Fine-Tune an Open Source LLM Step-by-Step (2025 Edition) Part-1.
Fine-tuning an open-source Large Language Model (LLM) unlocks the ability to personalize language understanding and generation for specific tasks, domains, or industries. Whether you're building a legal assistant, coding helper, medical Q&A bot, or document summarizer — fine-tuning offers control, consistency, and domain expertise.
In this detailed guide, we’ll walk through the complete journey from beginner to expert — including:
🧩 Step-by-Step Mini Task Breakdown
Each section will build upon the previous and cover all the important blocks.
- Understanding the core idea of fine-tuning
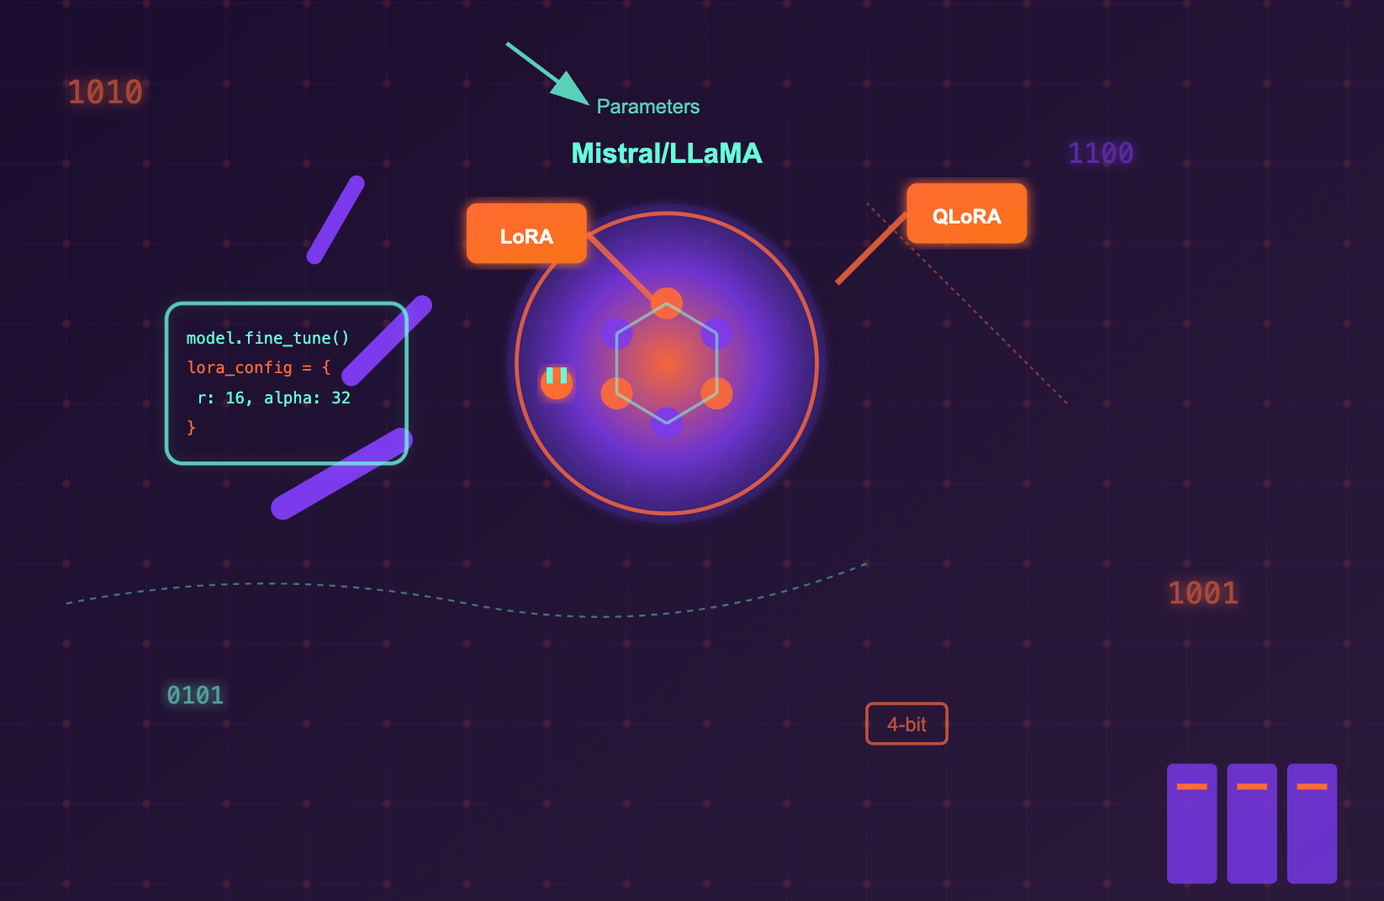
- Selecting the right model (Mistral, LLaMA, Gemma)
- Preparing your dataset for instruction/causal tuning
- Explaining Tokenization and Tokenizer Alignment
- Setting up environment (Colab, GPU, or local)
- Understanding QLoRA, PEFT, and bitsandbytes
- Writing a training script from scratch
- Monitoring training with metrics/logs (WandB, TensorBoard)
- Evaluating the model output (quantitative and qualitative)
- Saving, exporting, and deploying models (Hugging Face, FastAPI)
- Advanced topics: mixed precision, LoRA strategies, RAG + Fine-tune combo
- Common issues and debugging tips
We’ll also provide multiple code examples, JSON schemas, real-world datasets, and visualization diagrams throughout.
🛠️ 7. Writing the Fine-Tuning Training Script
This section shows you how to combine everything — model loading, tokenizer alignment, LoRA adapters, and quantization — into a reproducible fine-tuning pipeline using Hugging Face’s Trainer.
This installs the essential libraries:
transformers: Hugging Face’s library for model loading/training.datasets: For loading and preprocessing datasets.peft: Implements LoRA/QLoRA for parameter-efficient tuning.accelerate: Enables multi-GPU training.bitsandbytes: Provides 4-bit/8-bit quantization.
pip install transformers datasets peft accelerate bitsandbytesModel & Tokenizer Loading (AutoModelForCausalLM, AutoTokenizer)
from transformers import AutoModelForCausalLM, AutoTokenizer, BitsAndBytesConfig

model_id = "mistralai/Mistral-7B-Instruct-v0.2"

bnb_config = BitsAndBytesConfig(
    load_in_4bit=True,
    bnb_4bit_compute_dtype="float16",
    bnb_4bit_use_double_quant=True,
    bnb_4bit_quant_type="nf4"
)

model = AutoModelForCausalLM.from_pretrained(
    model_id,
    quantization_config=bnb_config,
    device_map="auto"
)
tokenizer = AutoTokenizer.from_pretrained(model_id)
🔧 Add LoRA Adapters (QLoRA)
from peft import LoraConfig, get_peft_model, TaskType

peft_config = LoraConfig(
    r=16,
    lora_alpha=32,
    target_modules=["q_proj", "v_proj"],
    lora_dropout=0.05,
    task_type=TaskType.CAUSAL_LM
)

model = get_peft_model(model, peft_config)
model.print_trainable_parameters()- Why LoRA?: Trains only 0.1% of parameters (e.g., 4M out of 7B) by injecting small adapters.
Key Settings:
r=16: Lower values (e.g., 8) save more memory but may reduce quality.target_modules: Apply LoRA to attention layers (q_proj,v_proj).
🗃️ Dataset Loading & Preprocessing
from datasets import load_dataset

dataset = load_dataset("json", data_files={"train": "data/train.jsonl"})- Dataset Format: Expects a JSONL file with
instruction,input(optional), andoutputfields.
Preprocessing:
- Combines
instructionandinputinto a prompt. - Tokenizes prompts and labels separately, then aligns them for training.
🧪 Preprocessing Function
def preprocess(examples):
    prompt = examples["instruction"] + "
" + examples.get("input", "")
    outputs = examples["output"]
    inputs = tokenizer(prompt, truncation=True, padding=False)
    labels = tokenizer(outputs, truncation=True, padding=False)
    inputs["labels"] = labels["input_ids"]
    return inputs

dataset = dataset.map(preprocess)
🏋️ Training Arguments + Launch
from transformers import TrainingArguments, Trainer

args = TrainingArguments(
    output_dir="checkpoints/finetuned-mistral",
    per_device_train_batch_size=2,
    gradient_accumulation_steps=4,
    save_strategy="epoch",
    num_train_epochs=3,
    logging_steps=10,
    bf16=True,  # or fp16 based on hardware
    report_to="none"
)

trainer = Trainer(
    model=model,
    args=args,
    train_dataset=dataset["train"]
)
trainer.train()
Critical Arguments:
gradient_accumulation_steps: Accumulates gradients over 4 batches before updating weights (reduces VRAM usage).bf16: Uses bfloat16 precision (faster than fp16 on modern GPUs).- Logging: No external logging (
report_to="none"), but you can add WandB/TensorBoard later.
🔥 Output Check
prompt = "Explain LangChain in simple terms."
inputs = tokenizer(prompt, return_tensors="pt").to("cuda")
outputs = model.generate(**inputs, max_new_tokens=200)
print(tokenizer.decode(outputs[0], skip_special_tokens=True))
How It Works:
- Tokenizes the prompt.
- Generates text autoregressively (up to 200 tokens).
- Decodes the output while removing special tokens (e.g.,
<s>).
Key Takeaways
- Quantization + LoRA enables fine-tuning 7B models on 10GB GPUs.
- Dataset Format: Must include
instruction/output(and optionallyinput). - LoRA Tradeoffs: Higher
rvalues improve quality but use more VRAM. - Training Stability:
gradient_accumulation_stepshelps with small batch sizes.
For a complete project, add:
- WandB logging:
report_to="wandb"inTrainingArguments. - Evaluation script: Use
evaluatelibrary for metrics.
In the next section, we’ll cover monitoring your training with logs, WandB, and TensorBoard — plus evaluating quality with real metrics.
📊 8. Monitoring Training & Evaluation Metrics
Fine-tuning LLMs is not a "set it and forget it" process. You need to track:
- Training Stability (Is loss decreasing? Are gradients exploding?)
- Overfitting (Is validation loss diverging from training loss?)
- Output Quality (Are generations coherent? Task-specific metrics?)
✅ Built-in Logging with Trainer
The TrainingArguments in Hugging Face’s Trainer provides essential logging:
args = TrainingArguments(
    logging_dir="logs",          # Saves logs to ./logs/
    logging_steps=10,           # Log metrics every 10 steps
    evaluation_strategy="steps", # Evaluate periodically
    eval_steps=50,              # Evaluate every 50 steps
    save_strategy="epoch"       # Save model checkpoints per epoch
)
What You’ll See in Logs:
Step   | Training Loss | Learning Rate | Runtime (s)
-------------------------------------------------
10    | 2.341         | 5e-5          | 12.3
20    | 1.892         | 5e-5          | 11.8
Key Arguments:
logging_steps=10: Trade-off between granularity and log spam.evaluation_strategy="steps": Critical for catching overfitting early.
📈 TensorBoard Visualization
TensorBoard provides real-time training curves:
pip install tensorboard # if not installed
tensorboard --logdir logs/  # Launch in terminal
What to Monitor:
Training Loss
- Should decrease smoothly. Spikes may indicate unstable learning rates.
Validation Loss
- If it plateaus while training loss drops, you’re overfitting.
Learning Rate
- Verify scheduler behavior (e.g., linear decay).
https://huggingface.co/datasets/huggingface/documentation-images/resolve/main/tensorboard.png
(Example: Training/validation loss curves)
🔥 Weights & Biases (WandB) for Advanced Tracking
WandB adds cloud-based monitoring with richer visuals:
args = TrainingArguments(
    report_to="wandb",           # Auto-syncs to WandB
    run_name="mistral-finetune-test"  # Experiment ID
)
Track These in WandB:
- GPU Utilization: Spot bottlenecks (e.g., underused GPUs).
- Hyperparameters: Compare runs to find optimal settings.
- Model Predictions: Log sample generations over time.
https://wandb.me/training-dash
🧪 Evaluating Model Outputs
Loss alone isn’t enough. Add task-specific metrics:
1. Automated Metrics
from nltk.translate.bleu_score import sentence_bleu

reference = ["LangChain enables LLM apps."]
prediction = "LangChain helps build AI tools."
print(sentence_bleu([reference], prediction.split())) # Score: 0.0-1.0| Metric | Use Case | Interpretation |
|---|---|---|
| BLEU | Translation/Summarization | Higher = closer to reference |
| ROUGE | Summarization | Measures overlap of n-grams |
| F1 | Classification | Balance of precision/recall |
2. Human Evaluation
For open-ended tasks (e.g., chatbots):
- Fluency: Rate outputs 1–5 for coherence.
- Correctness: Verify factual accuracy.
- Toxicity: Use
detoxifyto filter harmful content.
3. Safety Checks
from detoxify import Detoxify

toxicity = Detoxify('original').predict("You’re stupid!")
print(toxicity["toxicity"]) # Score: 0.93 (high)- Critical for: Public-facing models to avoid harmful outputs.
🔍 Spotting Common Issues
| Symptom | Likely Cause | Fix |
|---|---|---|
| Loss spikes | Too high learning rate | Reduce LR or warmup steps |
| Validation loss ↑ | Overfitting | Add dropout, reduce epochs |
| BLEU score low | Poor token alignment | Check preprocessing steps |
📌 Key Takeaways
- Log aggressively: Use
logging_steps=10+ WandB/TensorBoard. - Validate early: Set
evaluation_strategy="steps"to catch issues. - Mix metrics: Combine loss, automated scores, and human eval.
Next Steps:
In the next section, we’ll save your fine-tuned model, export adapters, and prep for real-world deployment.
📊 9. Saving, Exporting, and Deploying Your Fine-Tuned Model
After successfully fine-tuning your model, the next critical step is saving, exporting, and deploying it for real-world use. This section covers best practices for persisting your model, merging adapters, and serving it via API—without modifying the original code.
💾 Saving Your Fine-Tuned Model (QLoRA/PEFT)
When using LoRA or QLoRA, only the adapter weights (not the full model) are trained. Here’s how to save them properly:
model.save_pretrained("checkpoints/finetuned-mistral")
tokenizer.save_pretrained("checkpoints/finetuned-mistral")
What Gets Saved?
✅ LoRA adapter weights (adapter_model.bin)
✅ Tokenizer config (tokenizer_config.json, special_tokens_map.json)
✅ Model configuration (config.json)
Why Save Separately?
- Smaller files: Adapters are ~10-100MB vs. full model (e.g., 13GB for Mistral-7B).
- Reusability: Apply the same adapters to different base models.
🛠️ Merging LoRA Adapters (Optional but Recommended for Deployment)
If you want a single, standalone model (without requiring PEFT at inference), merge the adapters into the base model:
merged_model = model.merge_and_unload()
merged_model.save_pretrained("checkpoints/merged-mistral")
When to Merge?
✔ Simplified deployment (no extra peft dependency)
✔ Better inference speed (no adapter overhead)
✔ Compatibility with tools that don’t support PEFT
Trade-offs
- Larger file size (now ~13GB for Mistral-7B instead of 100MB adapters).
- Loss of modularity (can’t swap adapters dynamically).
📤 Uploading to Hugging Face Hub (Optional)
Sharing your model publicly or privately is easy with the Hugging Face Hub:
- Log in via CLI:
huggingface-cli loginPush your model & tokenizer:
model.push_to_hub("your-username/finetuned-mistral")
tokenizer.push_to_hub("your-username/finetuned-mistral")
Benefits of Hugging Face Hub
🔹 Version control (track different fine-tuned versions)
🔹 One-line loading (AutoModel.from_pretrained("your-username/finetuned-mistral"))
🔹 Private repos for enterprise use
🌐 Deploying with FastAPI (Production-Ready Example)
To serve your model via a REST API:
from fastapi import FastAPI
from transformers import pipeline

app = FastAPI()
generator = pipeline("text-generation", model="checkpoints/merged-mistral")

@app.get("/generate")
def generate(prompt: str):
    output = generator(prompt, max_new_tokens=200)
    return {"response": output[0]["generated_text"]}
Run the API Locally
uvicorn app:app --host 0.0.0.0 --port 8000 Scaling for Production
- Use GPU acceleration (e.g.,
docker run --gpus all) - Add rate limiting (e.g., FastAPI’s
slowapi) - Deploy on Kubernetes for high availability
🔍 Key Considerations
1. Quantization for Efficient Serving
If deploying on edge devices or low-resource cloud instances, requantize the merged model:
from transformers import BitsAndBytesConfig

quant_config = BitsAndBytesConfig(load_in_4bit=True)
model = AutoModelForCausalLM.from_pretrained("merged-mistral", quantization_config=quant_config)
2. Security & Moderation
- Filter harmful outputs with
transformers.TextClassificationPipeline. - Use API keys to restrict access.
3. Monitoring & Logging
- Track API usage with Prometheus/Grafana.
- Log prompts/responses for fine-tuning iterations.
Next, we’ll explore advanced topics like mixed precision training, LoRA hyperparameter tuning, and combining RAG with fine-tuned models for maximum performance.
🧬 10. Advanced Topics: Mixed Precision, LoRA Strategies, and RAG + Fine-Tuning
Fine-tuning LLMs isn’t just about running a script and hoping for the best. If you want real performance gains, you’ll need to dig deeper into mixed precision training, LoRA tuning, and hybrid approaches like RAG. Let’s break it down—without the fluff.
⚡ Mixed Precision Training (FP16/BF16) – Faster, Cheaper Training
Why Bother?
- Trains faster (up to 2x speedup on modern GPUs).
- Uses less memory (~50% reduction), letting you fit bigger batches.
How It Works
Instead of using full 32-bit floating-point (FP32), mixed precision:
- Stores weights in FP16/BF16 (smaller, faster).
- Keeps critical ops in FP32 (prevents numerical instability).
How to Enable It
args = TrainingArguments(
    bf16=True,  # Use BF16 on Ampere GPUs (A100, H100, RTX 4090)
    fp16=True,   # Fallback for older GPUs (V100, T4)
    gradient_checkpointing=True  # Saves even more memory
)
Which One to Use?
bf16→ Better range, less rounding error (preferred if your GPU supports it).fp16→ Wider compatibility but risk of overflow.
Gotchas:
❌ Don’t use both bf16 and fp16 at the same time.
⚠️ If loss goes to NaN, reduce learning rate or disable mixed precision.
🔬 LoRA Hyperparameter Tuning – Getting the Most Out of Small Adapters
LoRA is powerful, but default settings aren’t always optimal. Here’s what actually matters:
Key Parameters & Their Effects
| Parameter | Default | What It Does | When to Change |
|---|---|---|---|
r (Rank) | 8 | Controls adapter size | Increase for complex tasks (e.g., coding) |
lora_alpha | 32 | Scales adapter outputs | Higher = stronger adaptation |
lora_dropout | 0.05 | Prevents overfitting | Increase if model memorizes data |
target_modules | ["q_proj", "v_proj"] | Which layers to adapt | Add k_proj for better reasoning |
Optimized LoRA Config Example
peft_config = LoraConfig(
    r=16,             # More capacity for coding tasks
    lora_alpha=32,    # Balanced scaling
    lora_dropout=0.1, # Slightly higher for small datasets
    target_modules=["q_proj", "v_proj", "k_proj"]  # More layers = better adaptation
)
Pro Tips:
- Start small (
r=8) and increase only if needed. - Monitor loss closely—if it’s erratic, reduce
lora_alpha. - Use
target_modules=["all"](if supported) for maximum flexibility.
🔗 Combining RAG with Fine-Tuning – Best of Both Worlds
Why RAG + Fine-Tuning?
- Fine-tuning makes the model good at your task.
- RAG gives it fresh, external knowledge (no retraining needed).
How It Works
- Fine-tune a small model (e.g., Gemma 2B) to follow instructions well.
- Use RAG to fetch relevant info (e.g., company docs, latest research).
- Feed both into the prompt:
retrieved_context = "Latest policy: Employees get 30 days PTO..."
prompt = f"""
{retrieved_context}

Answer based on the above: How much PTO do we get?
"""
Tools to Implement RAG
llama_index– Simple document retrieval.chromadb– Local vector database.langchain– For complex workflows.
When to Use This Combo?
✔ Your data changes often (e.g., customer support docs).
✔ You need accuracy + low inference cost.
🚀 Key Takeaways
- Mixed Precision → Faster training, less memory (use
bf16if possible). - LoRA Tuning → Adjust
r,alpha, anddropoutfor your task. - RAG + Fine-Tuning → Better than either approach alone.
In the next section, we’ll cover common troubleshooting tips, debugging strategies, and how to avoid pitfalls during fine-tuning.
🛠️ 11. Common Troubleshooting and Debugging Strategies
Fine-tuning LLMs should be straightforward—until it isn’t. You hit cryptic errors, your model spews nonsense, or worse, it crashes mid-training. Let’s cut through the frustration with practical fixes for real-world problems.
⚠️ "Help, My Training Crashed!" – Common Errors & Quick Fixes
1. CUDA Out of Memory
What you see:
RuntimeError: CUDA out of memory. Why it happens:
- Your GPU can’t handle the batch size.
- LoRA rank (
r) is too high. - You forgot gradient checkpointing.
How to fix:
# Reduce batch size first
args = TrainingArguments(per_device_train_batch_size=2)

# Enable memory savings
args = TrainingArguments(
    gradient_checkpointing=True,  # Slower but saves memory
    gradient_accumulation_steps=4  # Simulates larger batches
)
Still crashing?
- Use
nvidia-smito check GPU usage. - Try 4-bit quantization (
BitsAndBytesConfig(load_in_4bit=True)).
2. Loss is NaN (Not a Number)
What you see:
Loss: nan Why it happens:
- Learning rate is too high.
- Mixed precision (
fp16/bf16) instability.
How to fix:
# Lower the learning rate
args = TrainingArguments(learning_rate=5e-6)  # Start small

# Disable mixed precision as a test
args = TrainingArguments(bf16=False)
3. Model Output is Garbage
What you see:
Input: "Explain quantum physics"
Output: "The banana is happy 42 potato."
Why it happens:
- Tokenizer mismatch (e.g., forgot to add special tokens).
- Dataset formatting is broken.
- LoRA rank (
r) is too low.
How to debug:
# Manually check tokenization
sample = dataset["train"][0]
print(tokenizer.decode(tokenizer(sample["text"])["input_ids"]))

# Verify LoRA is actually training
model.print_trainable_parameters()  # Should show >0 params
🧪 Dataset Debugging Checklist
Your data is the most likely culprit. Before blaming the model:
✅ Confirm JSON structure:
# Should have "instruction", "input" (optional), "output"
print(dataset["train"][0])
✅ Check for special tokens:
- Mistral needs
[INST]and[/INST]. - Llama 3 uses
<|begin_of_text|>.
✅ Test tokenization:
# Does the decoded text make sense?
print(tokenizer.decode(tokenizer("Hello world")["input_ids"]))
📊 "My Model Sucks" – Diagnosing Bad Performance
If your fine-tuned model is underperforming:
🔍 Check the dataset:
- Is it high-quality? Scrub noisy examples.
- Is it big enough? <1K samples? Try RAG instead.
🔍 LoRA Config:
- Increase rank (
r) if the task is complex. - Add more layers (
target_modules=["q_proj","v_proj","k_proj"]).
🔍 Training Time:
- Too short? Loss may not have converged.
- Too long? Check for overfitting (validation loss rising).
Still bad?
- Compare against a baseline (e.g., raw model without fine-tuning).
- Add human evaluation—automated metrics lie sometimes.
🚀 Final Advice
- Start small: Debug on a tiny dataset first.
- Log everything: Use
TrainingArguments(logging_steps=10). - Reproducibility: Set
--seed 42in your scripts.
In the next and final section, we’ll summarize key takeaways and share next steps for production deployment and scaling your fine-tuned models.
✅ 12. Key Takeaways and Next Steps for Scaling LLM Fine-Tuning
Congratulations — you've now completed the full beginner-to-expert roadmap for fine-tuning open-source LLMs.
Here’s a recap of essential steps and pro-level recommendations:
🚀 Fine-Tuning Quick Checklist
✔ Choose your base model wisely (Mistral, LLaMA, Gemma, Phi-3)
✔ Align tokenizer and special tokens
✔ Prepare high-quality, diverse datasets (instruction or chat)
✔ Use QLoRA/PEFT for parameter-efficient training
✔ Optimize hardware with mixed precision, gradient checkpointing
✔ Monitor progress with TensorBoard, WandB, and human evaluation
✔ Save LoRA adapters or merged models for easy deployment
✔ Combine RAG with fine-tuned models for domain-specific performance
🌐 Recommended Next Steps
- ✅ Test inference with your fine-tuned model using real-world prompts
- ✅ Deploy via FastAPI, Streamlit, or LangChain apps
- ✅ Explore larger models (13B/70B) with Colab Pro+, Lambda Labs, or on-prem GPUs
- ✅ Use Hugging Face Hub to manage versions and share models securely
- ✅ Continuously update datasets — your model improves with better data
- ✅ Experiment with Retrieval Augmented Generation (RAG) to boost accuracy
- ✅ Try lightweight fine-tuning with LLaMA 3, Mixtral, Phi-3, or Gemma
🔗 Useful Resources
- Hugging Face PEFT: https://huggingface.co/docs/peft/
- Mistral models: https://huggingface.co/mistralai
- LLaMA 3: https://huggingface.co/meta-llama
- RAG frameworks: https://github.com/jerryjliu/llama_index
- Model Zoo: https://huggingface.co/models
🎯 Final Thought
"Your model is only as good as your data."
Spend time curating clean, domain-relevant examples, and your fine-tuned LLM will outperform much larger base models — at a fraction of the cost.
For questions, live workshops, or dataset reviews, connect on or visit ashutosh.dev.
Good luck with your fine-tuning journey!
AK Newsletter
Join the newsletter to receive the latest updates in your inbox.


%20Part-2)