
What are Svelte Action
Disclaimer, that this articles presumes, you know:
- Svelte
- How to get started with Svelte
- Basic understanding of HTML/CSS
If you don't know anyone of the above, then you are not ready to start with this tutorial.
Whenever svelte initiates a function call during the element creation in the DOM, these functions are Actions. They return an object with a destroy method after the element unmount.
When an element appends to the DOM, Svelte calls a function(node) and, passes the node as its argument. It comes in handy when we need to change a DOM's property.
With the help of the use directive, We specified Actions on elements.
I understand the definition of Actions is quite confusing and difficult to understand. Let's understand it with the help of an example.
In the App.svelte, write the following code:
<script>
    function showNodeDetails(node) {
        console.log("Id of the element: " + node.id)
        console.log("TagName: " + node.tagName)
        console.log("Element classes: " + node.className)
        console.log("Text:" + node.innerText)
    }
</script>

<main>
    <p id="svelte-paragraph" class="svelte-class" use:showNodeDetails> Svelte is cool to go with!!! </p>
</main>

<style>
	main {
		text-align: center;
		padding: 1em;
		max-width: 240px;
		margin: 0 auto;
	}


	@media (min-width: 640px) {
		main {
			max-width: none;
		}
	}
</style>
use:function_name() is the way to defined Actions in Svelte. In our case, use:showNodeDetails is the actions defined on the DOM.
If you go to the web page and check the console logs, you will see:
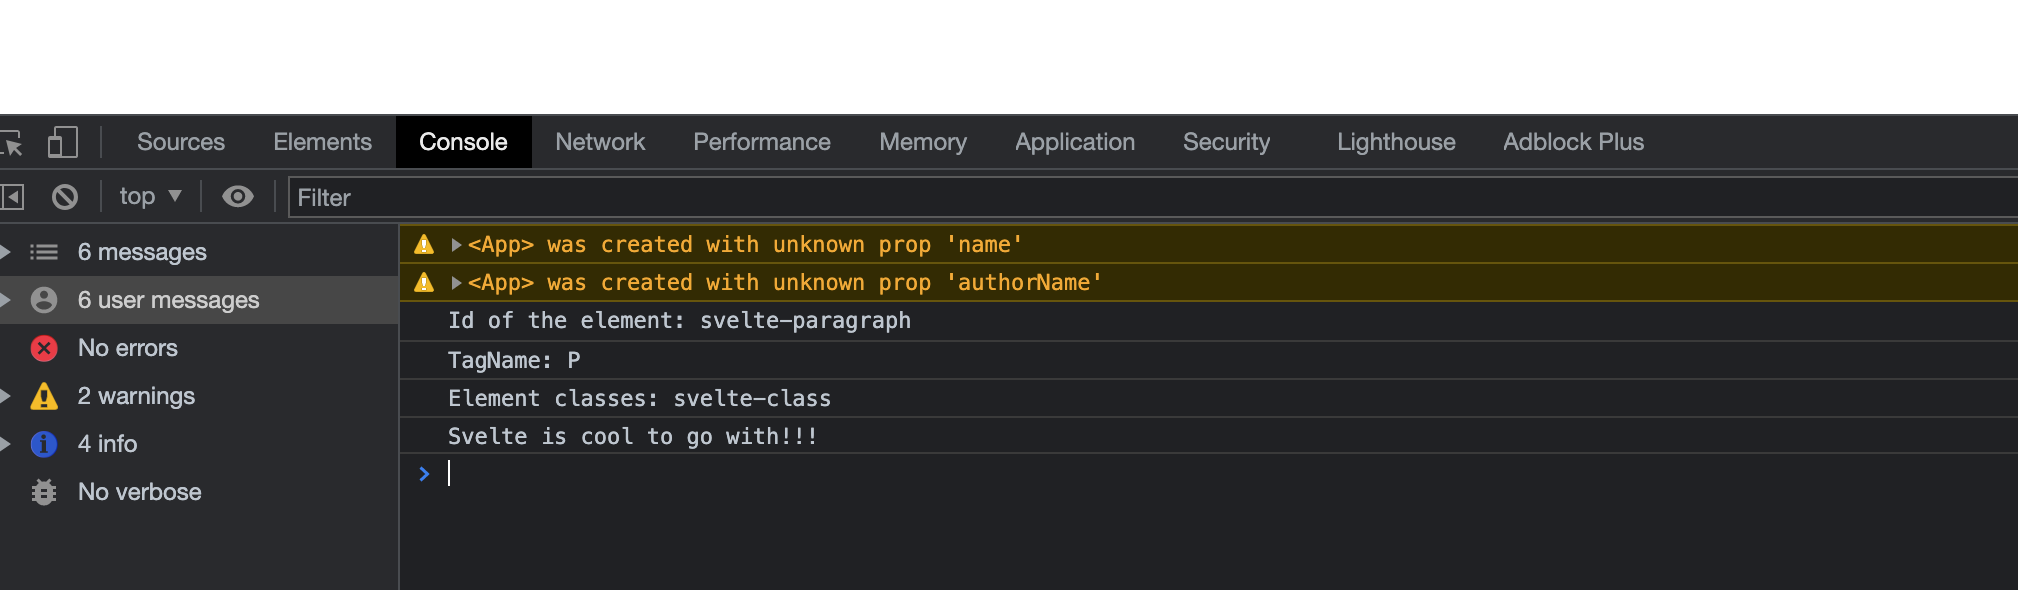
The first two warning messages are pretty obvious and expected, as we don't have the name of the app and author name. So we can ignore these warning messages.
We can observe that the showNodeDetails(node) is called when the application is loaded, console logs are written as directed by the showNodeDetails function.
But these are the console logs. What if we want to modify the DOM properties. Like changing the default colour to red and show and hide on the basis of a checkbox. In the App.svelte, under the script update the following code.
<script>
    let show = true;

    function showAndHideNode(node) {
        node.setAttribute("style", "color: red;")
    }
</script>
Under the script, we are returning the destroy() method, which is optional. If we remove the destroy() our application still works.
Now, under the main, we create a checkbox and bind it with the show variable (defined in script). After that, we add a condition, if the show variable is valid, it will show our element with Action otherwise show element destroyed.
<main>

    <input type="checkbox" bind:checked={show}>

    {#if show}
        <p id="svelte-paragraph" class="svelte-class" use:showAndHideNode> Svelte is cool to go with!!! </p>
    {:else }
        <p>
            <strong class="svelte-class" > Svelte element Destroyed </strong>
        </p>

    {/if}
</main>

<style>
	main {
		text-align: center;
		padding: 1em;
		max-width: 240px;
		margin: 0 auto;
	}


	@media (min-width: 640px) {
		main {
			max-width: none;
		}
	}
</style>
Complete App.svelte file will look like this:
<script>
    let show = true;

    function showAndHideNode(node) {
        node.setAttribute("style", "color: red;")
    }
</script>

<main>

    <input type="checkbox" bind:checked={show}>

    {#if show}
        <p id="svelte-paragraph" class="svelte-class" use:showAndHideNode> Svelte is cool to go with!!! </p>
    {:else }
        <p>
            <strong class="svelte-class" > Svelte element Destroyed </strong>
        </p>

    {/if}
</main>

<style>
	main {
		text-align: center;
		padding: 1em;
		max-width: 240px;
		margin: 0 auto;
	}


	@media (min-width: 640px) {
		main {
			max-width: none;
		}
	}
</style>
The application will work like the below gif.
Just try to remove the destroy() function. You'll notice the application still works as before.
In this article, we learn about the power of the svelte actions. See you in the next svelte articles.
AK Newsletter
Join the newsletter to receive the latest updates in your inbox.
